SECTION 501-12: Instrument Panel and Console
| 2014 Mustang Workshop Manual
|
REMOVAL AND INSTALLATION
| Procedure revision date: 01/07/2013
|
NOTE: Floor console with automatic transmission shown, floor console with manual transmission similar.
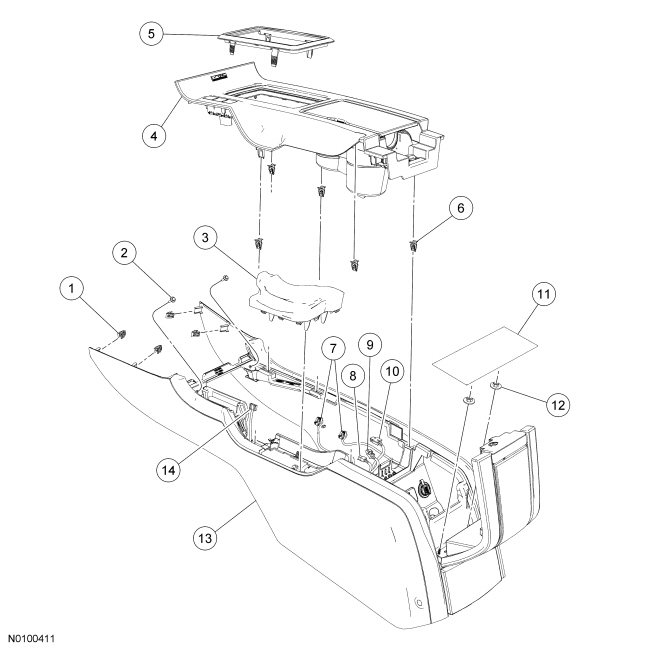
| Item | Part Number | Description |
|---|---|---|
| 1 | — | Floor console side panel retaining clip (part of 045A36) (4 required) |
| 2 | W707628 | Floor console screw (2 required) |
| 3 | 2404 | Parking brake control handle boot |
| 4 | 044D90 | Floor console finish panel |
| 5 | 7E391 | Selector lever bezel |
| 6 | — | Floor console finish panel retaining clip (part of 045A36) (5 required) |
| 7 | 14A005 | Ambient light electrical connectors |
| 8 | 14A005 | Universal Serial Bus (USB) electrical connector (if equipped) |
| 9 | 14A005 | Audio jack electrical connector |
| 10 | 14A005 | Power point electrical connector |
| 11 | 13586 | Storage compartment mat |
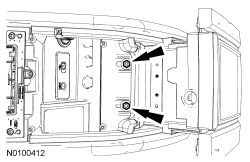
| 12 | W711098 | Floor console nut (2 required) |
| 13 | 045A36 | Floor console |
| 14 | 14A005 | Traction/hazard/trunk switch electrical connector |
Removal and Installation
All vehicles
Vehicles with manual transmission
Vehicles with automatic transmission
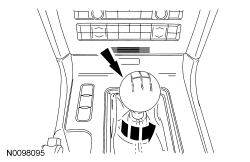
NOTICE: When prying on a component, a non-marring tool must be used or damage to the component may occur.
Remove the selector lever bezel.All vehicles