286-00002

286-00001
SECTION 501-35: Body Repairs
| 2014 Mustang Workshop Manual
|
GENERAL PROCEDURES
| Procedure revision date: 01/07/2013
|
 | Rust Inhibitor Installation Kit
286-00002 |
 | Undercoating Spray Gun
286-00001 |
| Item | Specification |
|---|---|
| Motorcraft® Metal Surface Prep
ZC-31-A | — |
| Premium Undercoating
ValuGard™ VG101, VG101A (aerosol) | — |
| Rust Inhibitor
ValuGard™ VG104, VG104A (aerosol) | — |
 WARNING: Always refer to Material Safety Data Sheet (MSDS) when handling chemicals and wear protective equipment as directed. Examples may include but are not limited to respirators and chemically resistant gloves. Failure to follow these instructions may result in serious personal injury.
 WARNING: Always wear protective equipment including eye protection with side shields, and a dust mask when sanding or grinding. Failure to follow these instructions may result in serious personal injury.
NOTICE: Drilling access holes in body panels is not recommended. Drilling holes will break the original paint finish and promote corrosion.
NOTE: Corrosion protection needs to be restored whenever it is necessary to sand or grind through painted surfaces or E-coat, or when bare metal repairs are made.
NOTE: Refer to product label for preparation and handling instructions.
NOTE: The following illustrations provide typical applications of body seams and spot welded flanges and are not vehicle specific.
NOTE: Door assembly lower view.
Apply rust inhibitor as shown to the inside of the door shell on all the interior metal surfaces using the most suitable applicator wand. Apply material to the exposed edges after carrying out the welding process. Make sure horizontal surfaces are well protected as they are more susceptible to corrosion. Keep door drain holes clear to prevent moisture buildup.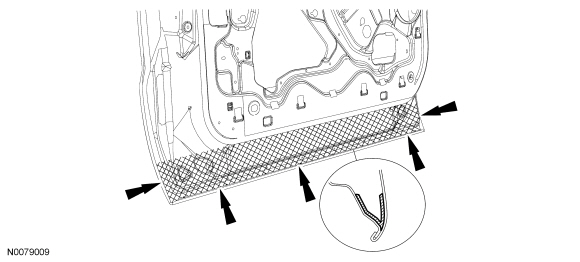
NOTE: Quarter panel inner view.
Apply rust inhibitor to the closed channel portion of the spot weld flange areas using the short, hook-shaped wand. Apply material to the exposed edges after carrying out the welding process. Make sure horizontal surfaces are well protected as they are more susceptible to corrosion.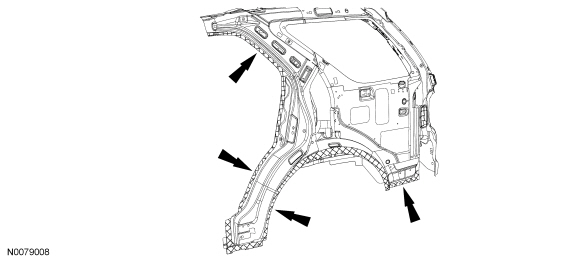
NOTE: Door frame opening view.
Apply rust inhibitor to the closed channel portion of the spot weld flange areas using the short, hook-shaped wand. Make sure horizontal surfaces are well protected as they are more susceptible to corrosion.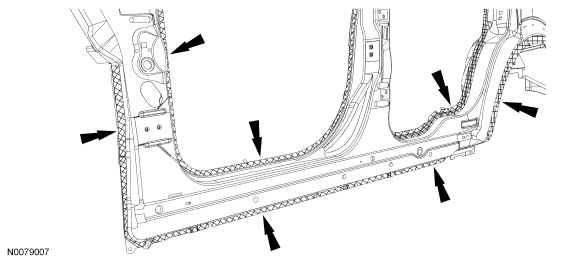
Body and Frame Undercoating
 WARNING: Always refer to Material Safety Data Sheet (MSDS) when handling chemicals and wear protective equipment as directed. Examples may include but are not limited to respirators and chemically resistant gloves. Failure to follow these instructions may result in serious personal injury.
 WARNING: Always wear protective equipment including eye protection with side shields, and a dust mask when sanding or grinding. Failure to follow these instructions may result in serious personal injury.
NOTICE: Do not allow undercoating on powertrain components. Failure to follow these instructions may result in incorrect operation of these components.
NOTE: Refer to product label for preparation and handling instructions.
NOTE: Avoid high-pressure water spray cleaning to treated underbody area for 24 hours.
Wire brush the area and make sure the surfaces are free of oil, dirt and other foreign material. Carry out the undercoating process in the following sequence.NOTE: The following illustrations provide typical applications to frame rails and are not vehicle specific.
NOTE: Frame rail exterior spot-weld flange view.
Apply undercoat material to the exterior exposed edges after carrying out the welding and refinishing process.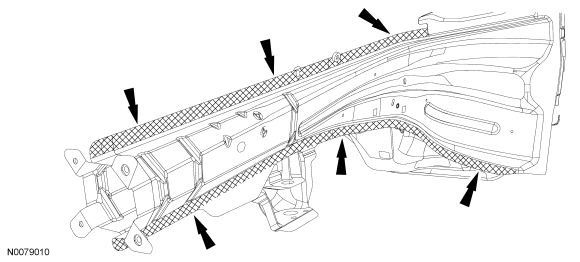
NOTE: Cross section view of typical unibody frame rail shown.
Apply rust inhibitor to the inner surfaces of the rail after carrying out welding process. Use the long wand and insert as far as possible, depress trigger and wait 2-3 seconds and slowly pull the wand to make sure the area is completely fogged.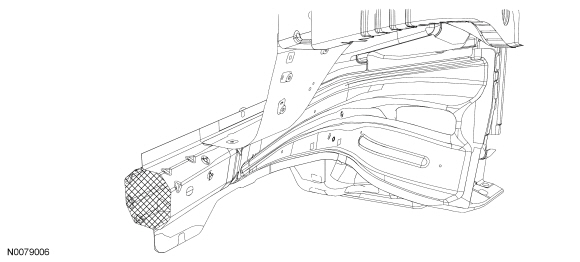
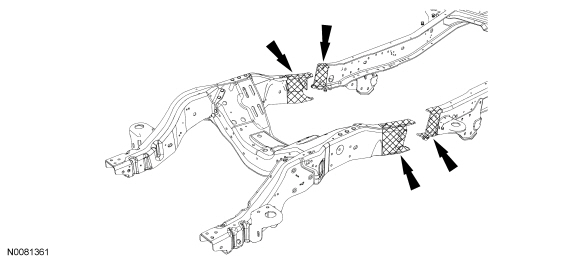
NOTE: Full frame vehicle, front rail-to-mid rail section repair shown.
Apply undercoat material to the exposed surfaces after carrying out the welding process. Make sure to completely cover any bare metal areas.