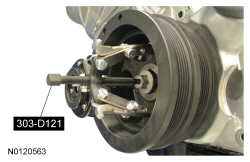
303-D121 or equivalent

303-335 (T88T-6701-A2 plate only)

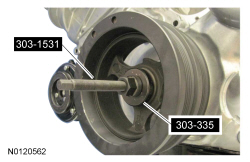
303-1531

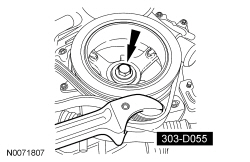
303-D055 (D85L-6000-A) or equivalent

SECTION 303-01B: Engine — 5.0L (4V)
| 2014 Mustang Workshop Manual
|
IN-VEHICLE REPAIR
| Procedure revision date: 01/07/2013
|
| 3 Jaw Puller
303-D121 or equivalent |
| Installer, Front Cover Oil Seal
303-335 (T88T-6701-A2 plate only) |
| Installer, Front Crank Seal and Damper
303-1531 |
| Strap Wrench
303-D055 (D85L-6000-A) or equivalent |
| Vehicle Communication Module (VCM) and Integrated Diagnostic System (IDS) software with appropriate hardware, or equivalent scan tool
|
| Item | Specification |
|---|---|
| Motorcraft® SAE 5W-20 Premium Synthetic Blend Motor Oil (US); Motorcraft® SAE 5W-20 Super Premium Motor Oil (Canada)
XO-5W20-QSP (US); CXO-5W20-LSP12 (Canada) | WSS-M2C945-A |
| Motorcraft® Silicone Gasket and Sealant
TA-30 | WSE-M4G323-A4 |
Removal
NOTICE: During engine repair procedures, cleanliness is extremely important. Any foreign material, including any material created while cleaning gasket surfaces, that enters the oil passages, coolant passages or the oil pan, can cause engine failure.
Installation
NOTE: If not secured within 5 minutes, the sealant must be removed and the sealing area cleaned with silicone gasket remover and metal surface prep. Failure to follow this procedure can cause future oil leakage.
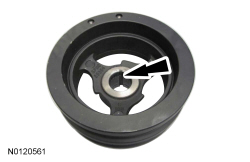
Apply silicone gasket and sealant to the Woodruff key slot in the crankshaft pulley.