303-D087 (D93P-6001-A1) or equivalent

303-F070

303-F072
SECTION 303-01C: Engine — 5.8L (4V)
| 2014 Mustang Workshop Manual
|
IN-VEHICLE REPAIR
| Procedure revision date: 01/07/2013
|
| Lifting Bracket, Engine
303-D087 (D93P-6001-A1) or equivalent |
| Support Bar, Engine
303-F070 |
| Support Bar, Engine
303-F072 |
| Item | Specification |
|---|---|
| Motorcraft® Metal Surface Prep
ZC-31-A | — |
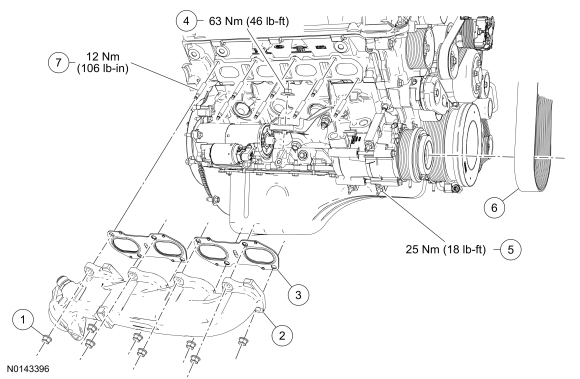
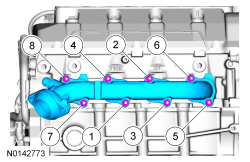
| Item | Part Number | Description |
|---|---|---|
| 1 | W701706 | RH exhaust manifold nut (8 required) |
| 2 | 9428 | RH exhaust manifold |
| 3 | 9Y431 | RH exhaust manifold gasket (2 required) |
| 4 | W712530 | RH engine support insulator nut |
| 5 | W707821 | A/C compressor stud bolt (3 required) |
| 6 | 8620 | Supercharger (SC) drive belt |
| 7 | W707747 | RH exhaust manifold stud (8 required) |
Removal
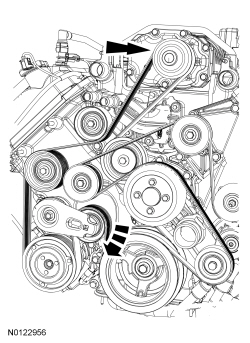

NOTE: The heavy duty Engine Support Bar (303-F070) must be used with the draw screws from the light duty Engine Support Bar (303-F072). This will provide enough clearance between the SC and the Engine Support Bar, and enough clearance between the draw screw and the vehicle hood.
Install the Engine Support Bars.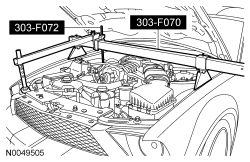
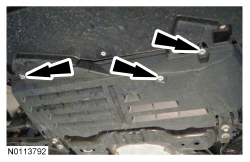
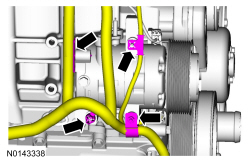
NOTE: The A/C compressor stud bolts must be loosened to gain access to the RH exhaust manifold nuts.
Loosen the A/C compressor stud bolts 25 mm (0.98 in).Installation
NOTICE: Do not use metal scrapers, wire brushes, power abrasive discs or other abrasive means to clean the sealing surfaces. These tools cause scratches and gouges which make leak paths. Use a plastic scraping tool to remove all traces of old sealant.
Clean the exhaust manifold mating surface of the cylinder head with metal surface prep. Follow the directions on the packaging.NOTE: Hand start the studs first.
Install the 8 new RH exhaust manifold studs.