SECTION 205-01: Driveshaft
| 2014 Mustang Workshop Manual
|
REMOVAL AND INSTALLATION
| Procedure revision date: 01/07/2013
|
| Item | Specification |
|---|---|
| Threadlock and Sealer
TA-25 | WSK-M2G351-A5 |
| Item | Part Number | Description |
|---|---|---|
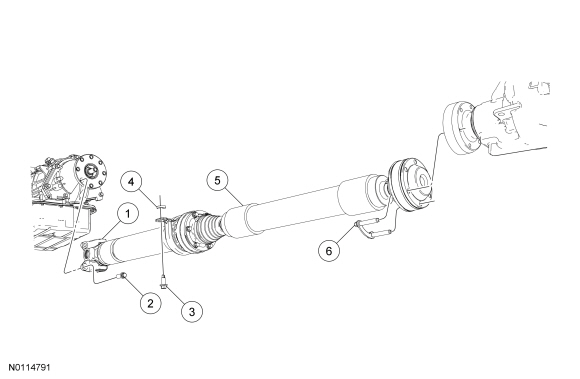
| 1 | — | Driveshaft flange (part of 4K145) |
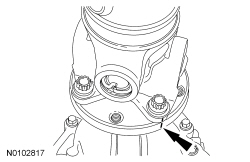
| 2 | N800594 | Driveshaft flange bolt (4 required) |
| 3 | N506434 | Center bearing bolt (2 required) |
| 4 | W710432 | Spacer (2 required) |
| 5 | 4K145 | Driveshaft assembly |
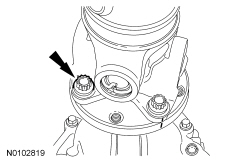
| 6 | 4B496 | Driveshaft CV joint bolt and washer assembly (3 required) |
Removal and Installation
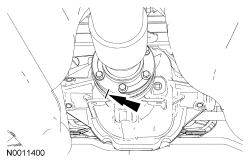
NOTE: The driveshaft flanges fit tightly on the transmission flange pilot. Never hammer on the driveshaft or any of its components to disconnect the driveshaft flange from the transmission flange pilot. Pry only in the area shown, with a suitable tool, to disconnect the driveshaft flange from the transmission flange pilot.
Using a suitable tool as shown, disconnect the driveshaft flange from the transmission flange pilot.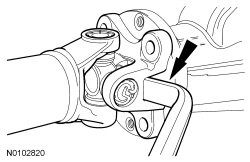
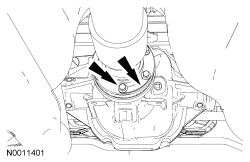
NOTE: Install the center bearing spacers between the body and the center bearing bracket.
Remove and discard the 2 center bearing bolts and spacers, then remove the driveshaft.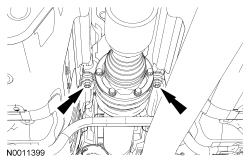
NOTICE: Do not disassemble the center CV joint when serving the drivshaft. Disassembly of the center CV joint will require the driveshaft to be balanced at a speed of at least 3000 rpm.
NOTE: If new driveshaft flange bolts or center bearing bolts are not available, coat the threads of the original bolts with threadlock and sealer and reuse the original washers and spacers.
NOTE: The driveshaft flanges fit tightly on the transmission output flange pilot. To make sure that the driveshaft flange seats squarely on the transmission output flange, tighten the driveshaft flange bolts evenly in a cross pattern.
To install, reverse the removal procedure.