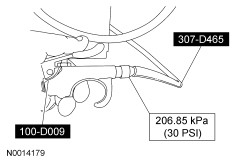
100-D009 (D93L-7000-A)

307-570

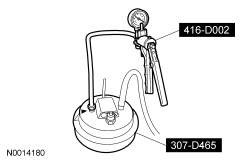
307-D465 or equivalent

416-D002 (D95L-7559-A) or equivalent

SECTION 307-01: Automatic Transaxle/Transmission — 6R80
| 2014 Mustang Workshop Manual
|
GENERAL PROCEDURES
| Procedure revision date: 01/07/2013
|
 | Rubber Tip Air Nozzle
100-D009 (D93L-7000-A) |
 | Transmission Fluid Fill Tube
307-570 |
 | Transporter Fluid Evacuator/Injector
307-D465 or equivalent |
 | Vacuum Pump Kit
416-D002 (D95L-7559-A) or equivalent |
 | Vehicle Communication Module (VCM) and Integrated Diagnostic System (IDS) software with appropriate hardware, or equivalent scan tool
|
| Item | Specification |
|---|---|
| Motorcraft® MERCON® LV Automatic Transmission Fluid
XT-10-QLVC (US); CXT-10-LV12 (Canada) | MERCON® LV |
Drain
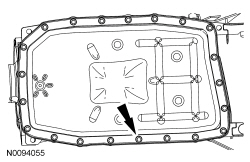
NOTE: The transmission fluid pan gasket can be reused if not damaged.
Install a new transmission fluid pan gasket, if required.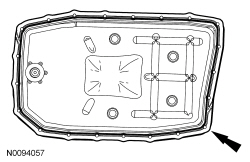

Refill
NOTICE: This procedure contains the air purge steps required to purge air from the transmission fluid cooling system. This procedure is NOT intended for use with the Transmission Fluid Level Check.
NOTICE: The vehicle should not be driven if the transmission fluid level is low as internal failure could result.
NOTICE: The transmission fluid fill plug is located near the exhaust system. The exhaust will be extremely hot during this procedure.
NOTICE: The use of any other transmission fluid than specified can result in the transmission failing to operate in a normal manner or transmission failure.
NOTE: If the transmission starts to slip, shifts slowly or shows signs of transmission fluid leaking, the transmission fluid level should be checked.
NOTE: Here is an overview of the Transmission Fluid Drain and Refill procedure.
NOTE: The transmission will need 3.3L (3.5 qt) of transmission fluid added to the transmission as an initial fill if:
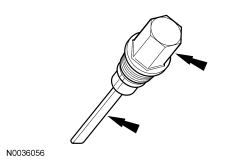
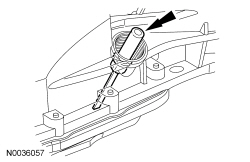
NOTICE: The vehicle is safe to drive with a cold TFT if the transmission fluid level is in the transmission fluid level indicator area below the crosshatch mark as shown. Failure to add transmission fluid to this level can result in damage to the transmission.
Add transmission fluid to the area on the transmission fluid level indicator below the crosshatch mark as shown.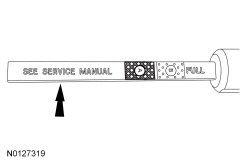
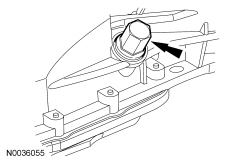
NOTE: Always drive the vehicle in a safe manner according to driving conditions and obey all traffic laws.
Drive the vehicle. While driving the vehicle, use the scan tool to verify that the TFT has reached a temperature of 88°C (190°F). This will circulate the transmission fluid through the torque converter and the transmission fluid cooling system, eliminating any trapped air in the transmission fluid cooling system.


NOTE: The transmission fluid level indicator has 2 areas for the fluid level, a crosshatched (labeled A) area and a dotted (labeled B) area. Use the crosshatched area when checking the transmission fluid level. The correct transmission fluid level is at the upper level of the crosshatch marks on the transmission fluid level indicator.
Using the scan tool verify that the TFT is between 80ºC-85ºC (176ºF-185ºF). The transmission fluid level must be at the upper level of the crosshatch mark.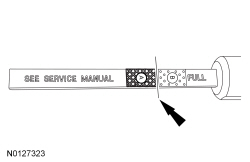
NOTE: If the transmission fluid is not at the correct level, follow the steps for Adding Additional Transmission Fluid or Removing Transmission Fluid in this procedure.
Install the transmission fluid fill plug.
Adding Additional Transmission Fluid
NOTE: To get an accurate transmission fluid level reading the engine should be idling (600-750 rpm) in PARK.
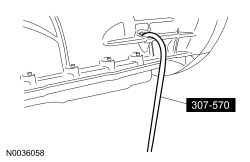
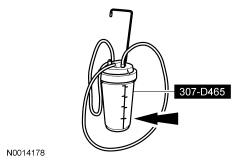
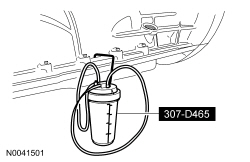
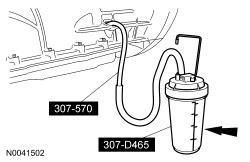
NOTE: Do not overfill the transmission. The transmission fluid level must be at the upper level of the crosshatch mark.
Reinstall the transmission fluid level indicator only back into the transmission fluid fill plug hole to check the transmission fluid level. Repeat this until a consistent reading is established.

NOTE: If the transmission fluid is over full, follow the steps for Removing Transmission Fluid in this procedure.
Install the transmission fluid fill plug.
Removing Transmission Fluid
NOTE: To get an accurate transmission fluid level reading the engine should be idling (600-750 rpm) in PARK.
