
307-346 (T97T-7902-A)
SECTION 307-01: Automatic Transaxle/Transmission — 6R80
| 2014 Mustang Workshop Manual
|
REMOVAL
| Procedure revision date: 01/07/2013
|
| Retainer, Torque Converter
307-346 (T97T-7902-A) |
All vehicles
NOTE: When the battery has been disconnected and reconnected, some abnormal drive symptoms can occur while the vehicle relearns its adaptive strategy. The customer needs to be notified that they can experience slightly different upshifts (either soft or firm) and that this is a temporary condition and will eventually return to normal operating condition.
NOTE: If the transmission is to be removed for an extended period of time, support the engine with a safety stand and a wood block.
NOTE: Refer to the Transmission Cooler Flushing Job Aid on the FMCDealer website.
Vehicles equipped with a 3.7L engine
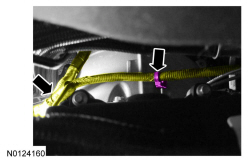
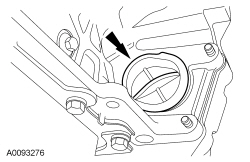
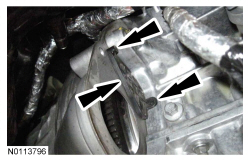
NOTE: The driveshaft flanges fit tightly on the transmission flange pilot. Never hammer on the driveshaft or any of its components to disconnect the driveshaft flange from the transmission flange pilot. Pry only in the area shown, with a suitable tool, to disconnect the driveshaft flange from the transmission flange pilot.
Using a suitable tool as shown, disconnect the driveshaft flange from the transmission flange pilot and position the driveshaft aside.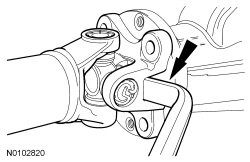
Vehicles equipped with a 5.0L (4V) engine
NOTICE: If the engine appearance cover is not removed, it will be damaged when lowering the transmission.
Remove engine appearance cover.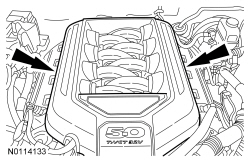
NOTE: The driveshaft flanges fit tightly on the transmission flange pilot. Never hammer on the driveshaft or any of its components to disconnect the driveshaft flange from the transmission flange pilot. Pry only in the area shown, with a suitable tool, to disconnect the driveshaft flange from the transmission flange pilot.
Using a suitable tool as shown, disconnect the driveshaft flange from the transmission flange pilot.All vehicles
NOTE: If transmission disassembly or installation of a new transmission is necessary, drain the transmission fluid.
Remove the transmission fluid pan bolts and the transmission fluid pan and allow the transmission fluid to drain.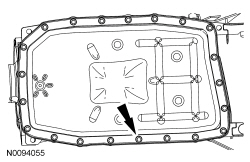
NOTE: It is not necessary to torque transmission fluid pan bolts at this time.
Install the transmission fluid pan.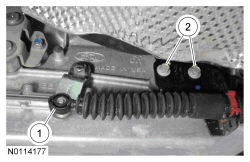
Vehicles equipped with a 5.0L (4V) engine


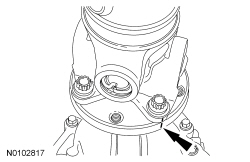
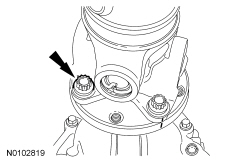
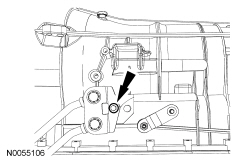
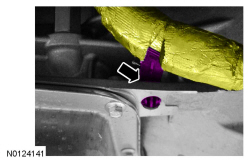
NOTE: Index-mark the end of one torque converter stud and the flexplate for installation.
Remove and discard the 4 flexplate-to-torque converter nuts.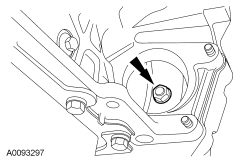
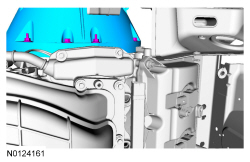
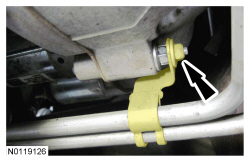
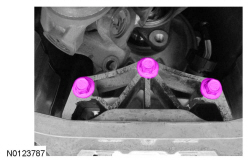
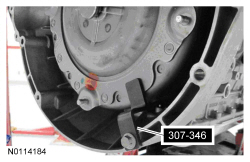
NOTE: 2 bolts shown, 3rd bolt is on top of starter.
Remove the 3 bolts and position the starter motor aside.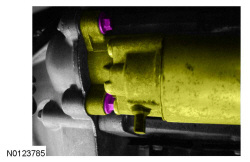
All vehicles
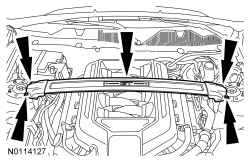
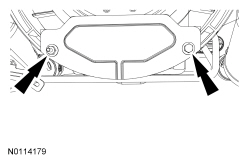
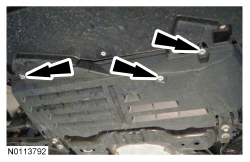
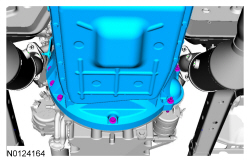
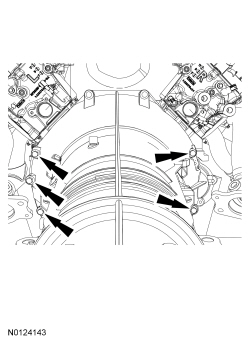
NOTE: RH shown, LH similar.
Remove the 4 nuts (2 shown) and the front crossmember brace.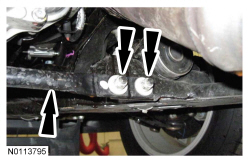
Vehicles equipped with a 3.7L engine
NOTE: Index-mark the end of one torque converter stud and the flexplate for installation.
Remove and discard the 4 flexplate-to-torque converter nuts.
All vehicles
NOTE: Make sure the transmission jack makes contact on the outer ribs of the transmission fluid pan.
Position a suitable high-lift transmission jack under the transmission.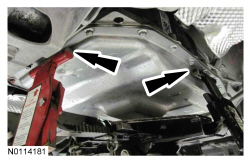

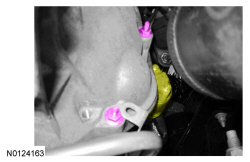
NOTICE: Do not pull on the wire harness to disconnect the connector or damage to the connector will occur.
Disconnect the transmission vehicle harness connector by twisting the outer shell and pulling back on the connector and position the harness aside.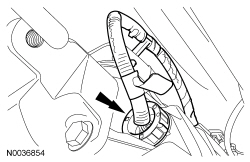
Vehicles equipped with a 3.7L engine
 WARNING: Always secure transmission, transfer case, and axle assemblies to their service jack. Avoid obstructions while lowering and raising the jack. Improperly secured assemblies or contact with obstructions may cause the assembly to fall off the jack, which could result in serious personal injury.
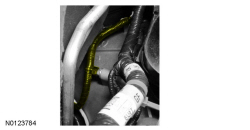
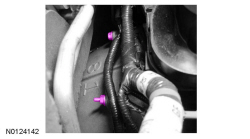
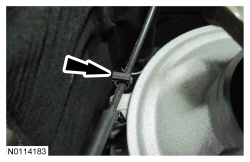
NOTE: Partially lower the transmission to gain access to wire harness.
Detach the wiring harness from the top of the transmission and position aside.Vehicles equipped with a 5.0L (4V) engine
WARNING: Always secure transmission, transfer case, and axle assemblies to their service jack. Avoid obstructions while lowering and raising the jack. Improperly secured assemblies or contact with obstructions may cause the assembly to fall off the jack, which could result in serious personal injury.
NOTE: Partially lower the transmission to gain access to wire harness.
Detach the wiring harness from the top of the transmission and position aside.NOTE: Using the transmission jack, rotate the transmission approximately 25 degrees clockwise.
Remove the transmission from the vehicle.All vehicles