SECTION 308-03B: Manual Transaxle/Transmission — TR6060
| 2014 Mustang Workshop Manual
|
INSTALLATION
| Procedure revision date: 01/07/2013
|
Transmission
Material
| Item
| Specification
|
|---|
Premium Long-Life Grease
XG-1-C or XG-1-K (US); CXG-1-C (Canada)
| ESA-M1C75-B
|
Threadlock and Sealer
TA-25
| WSK-M2G351-A5
|
Installation
 WARNING: Do not breathe dust or use compressed air to blow dust from storage containers or friction components. Remove dust using government-approved techniques. Friction component dust may be a cancer and lung disease hazard. Exposure to potentially hazardous components may occur if dusts are created during repair of friction components, such as brake pads and clutch discs. Exposure may also cause irritation to skin, eyes and respiratory tract, and may cause allergic reactions and/or may lead to other chronic health effects. If irritation persists, seek medical attention or advice. Failure to follow these instructions may result in serious personal injury.
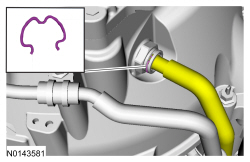
- If necessary, install the cooler tube on the transmission.
- Tighten to 11 Nm (97 lb-in).
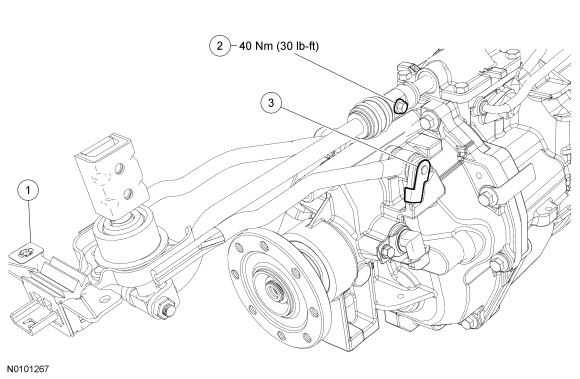
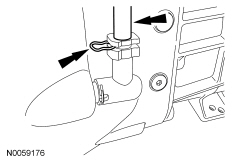
- If removed, install the gearshift lever assembly.
- Position the gearshift assembly on the transmission.
- Install the gearshift assembly bolt.
- Tighten to 40 Nm (30 lb-ft).
- Position the gearshift lever assembly retainers. Rotate the gearshift lever retainers to lock the clips.
NOTICE:
Before installing the transmission, clean and lubricate the input shaft with a small amount of grease.
NOTICE:
When installing the transmission with the gearshift lever attached, position the gear shifter into NEUTRAL position, so that the shifter will not damage the shift boot.
Position the transmission at a 45-degree angle, slide the input shaft into the pressure plate and rotate the transmission counterclockwise 45 degrees to align with the dowels.
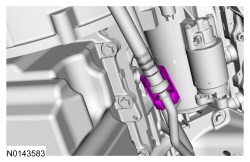
- Connect the wiring harness clip to the top of the transmission.
- Install the 6 transmission-to-engine bolts and the transmission-to-engine stud bolt.
- Tighten to 48 Nm (35 lb-ft).
- Connect the cooler tube to the transmission cooler tube.
- Install the cooler tube secondary latch.
- Connect the cooler tube to the transmission connector.
- Install the cooler tube bracket nut.
- Tighten to 48 Nm (35 lb-ft).
- Install the 2 engine spacer plate-to-transmission bolts.
- Tighten to 35 Nm (26 lb-ft).
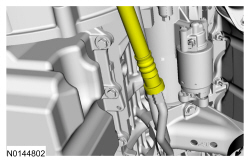
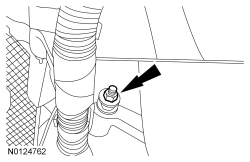
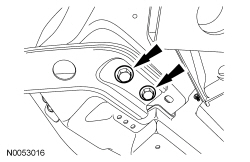
- Connect the clutch slave cylinder tube to the clutch slave cylinder connector.
- Attach the clutch hydraulic tube clip.
- Connect the wiring harness to the RH side of the transmission.
- Connect the
sensor electrical connector.
- Connect the reverse lamp switch electrical connector.
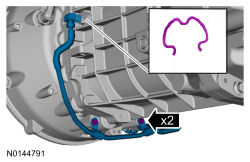
- Connect the 2 wiring harness clips.
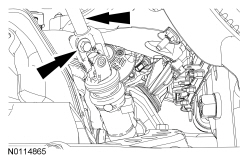
- Connect the wiring harness to the LH side of the transmission.
- Connect the reverse lockout solenoid electrical connector.
- Connect the 2 wiring harness clips.
- Install the wiring harness retaining nut.
- Tighten to 12 Nm (106 lb-in).
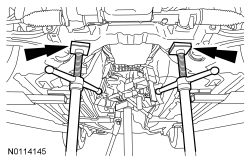
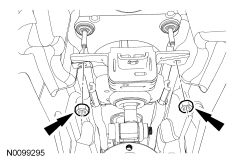
- Using the adjustable jackstands, raise the subframe to the marked position.
NOTE:
LH shown, RH similar.
Install the 4 rear subframe bolts.
- Tighten to 115 Nm (85 lb-ft).
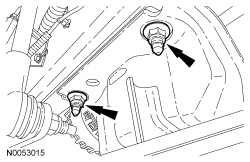
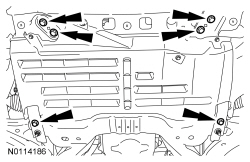
NOTE:
LH shown, RH similar.
Tighten the 4 front subframe nuts.
- Tighten to 115 Nm (85 lb-ft).
- Connect the steering column shaft and install the new steering column shaft pinch bolt.
- Tighten to 48 Nm (35 lb-ft).
- Install the transmission crossmember. Refer to
Section 502-00
.
- Install the 2 gearshift lever nuts.
- Tighten to 11 Nm (97 lb-in).
- Install the starter motor. Refer to
Section 303-06
.
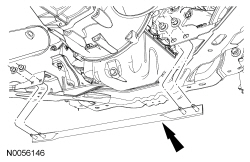
- Install the subframe cross brace and the 4 subframe cross brace nuts.
- Tighten to 48 Nm (35 lb-ft).
NOTE:
Align the index marks on the driveshaft flange and pinion flange, and the driveshaft flange and transmission output shaft flange.
Install the driveshaft. Refer to
Section 205-01
.
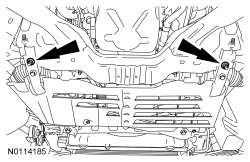
- Install the crossmember brace and 6 crossmember brace bolts.
- Tighten to 48 Nm (35 lb-ft).
- Tighten the 2 crossmember brace nuts to 48 Nm (35 lb-ft).
- If equipped, install the lower air deflector and install the 9 screws.
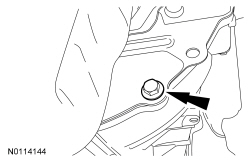
NOTICE:
The use of any other transmission fluid than specified can result in the transmission failing to operate in a normal manner or transmission failure.
Check, and as necessary, fill the transmission with transmission fluid. Apply threadlock and sealer to the fill plug threads and install the fill plug.
- Tighten to 25 Nm (18 lb-ft).
- Install the catalytic converter assembly (H-pipe). Refer to
Section 309-00
.
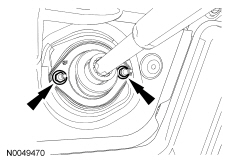
- Install the 2 dash boot bearing nuts.
- Tighten to 9 Nm (80 lb-in).
- Install the upper gearshift lever and the upper gearshift lever bolts.
- Tighten to 35 Nm (26 lb-ft).
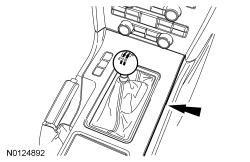
- Install the floor console finish panel.
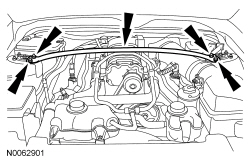
- If equipped, install the strut tower cross brace and 4 nuts.
- Tighten to 35 Nm (26 lb-ft).
- Connect the battery ground cable. Refer to
Section 414-01
.
- Fill the transmission with the correct fluid level. Refer to
Transmission Draining and Filling
.
WARNING: Carefully read cautionary information on product label. For emergency medical information seek medical advice. In the USA or Canada on Ford/Motorcraft products call: 1-800-959-3673. For additional information, consult the product Material Safety Data Sheet (MSDS) if available. Failure to follow these instructions may result in serious personal injury.
NOTICE:
Do not spill brake fluid on painted or plastic surfaces or damage to the surface may occur. If brake fluid is spilled onto a painted or plastic surface, immediately wash the surface with water.
Fill the brake and clutch reservoir. Bleed the clutch hydraulic system. Refer to
Section 308-02
.